What Is the Best LED Grow Light for a Beginner Home Cannabis Grow?
Your grow light is the single most important purchase you'll make. Get this wrong and no amount of perfect technique will save your yield. Get it right and everything else becomes easier.
What's covered in this guide
- Why your grow light is the most important decision
- LED types explained — quantum board vs blurple vs COB
- How much wattage do you actually need?
- Spectrum — does it matter for beginners?
- Top LED grow light picks for beginners (with Amazon links)
- How high to hang your light at each growth stage
- LED mistakes that cost beginners their yield
- FAQ
Walk into any grow store or browse Amazon and you'll find hundreds of LED grow lights with wildly different specs, claims, and price points. "Full spectrum 2000W equivalent!" "Military-grade chips!" "Samsung LM301B diodes!" It's confusing even for experienced growers. For beginners it's paralyzing.
This guide cuts through all of it. You'll learn exactly what matters, what doesn't, how to match a light to your tent size, and which specific products we recommend for different setups and budgets — all with direct Amazon links so you can buy with confidence.
Home cannabis cultivation laws vary by state and country. This guide is for adults in jurisdictions where personal cultivation is legally permitted.
Why your grow light is the most important purchase
Cannabis is a sun plant. In nature it grows in full, direct tropical sunlight — one of the most intense light environments on earth. Your grow light is replacing the sun inside a tent. Everything your plant produces — every gram of bud — comes directly from photosynthesis powered by your light. A weak light produces weak plants regardless of how perfect everything else is.
Here's the brutal truth beginners don't always hear: you can fix bad soil, fix pH problems, recover from overwatering, and work around poor genetics to some degree. You cannot fix an underpowered light. If your light isn't delivering enough photons to your canopy, your maximum possible yield is capped — no technique, no nutrient line, no training method can overcome it.
Spend at least 30–40% of your total grow budget on your light. A $500 setup with a $200 quality LED will outperform a $500 setup with a $60 budget LED every single time. This is the one place not to cut corners.
LED types explained — what the differences actually mean
Not all LEDs are the same. The technology inside your fixture determines efficiency, heat output, spectrum quality, and how well your plants actually respond to it. Here's every type you'll encounter and whether a beginner should consider it:
Many small, efficient LED chips spread across a flat board. Even light distribution, full spectrum, low heat per watt, dimmable. Uses Samsung LM301 or similar high-efficiency chips. This is what serious growers use.
✓ Recommended for BeginnersPurple/blue lights using cheap LED chips. Wildly inflated wattage claims (a "1000W" blurple often draws 100W). Poor spectrum, high heat, mediocre yields. Still flood Amazon with deceptive marketing.
✗ Do Not BuyCheap and accessible. Works fine for seedlings and clones. Not powerful enough for flowering — produces airy, underdeveloped buds. If you already have one, use it for seedlings only and upgrade for the full grow.
◆ Seedlings OnlyThe old standard before LEDs. Produces large yields but generates significant heat, requires ballasts, burns out bulbs, and costs more to run. Modern quantum board LEDs match or beat HID yields with better efficiency. Not recommended for beginners.
◆ Not for BeginnersHow much wattage do you actually need?
Wattage recommendations are based on your tent footprint — not your room size, not your number of plants. Here's the practical guide:
Perfect for 1–2 autoflowers or 1 photoperiod. Great starter setup.
Most popular beginner tent size. 2–4 plants comfortably.
Good for 2–4 plants. Square shape works well with a single centered light.
The serious home grower setup. Expect 4–6 plants and real commercial-quality yields.
A "2000W LED" on Amazon for $40 draws about 200W from the wall. Always look for the actual draw wattage in the product specs — the number labeled "true wattage," "actual power consumption," or "power draw (watts)." That's the real number. The inflated "equivalent" wattage is a marketing lie that tells you nothing about actual performance.
Spectrum — what beginners actually need to know
You'll see terms like "3000K," "5000K," "full spectrum," "red/blue ratio," and "UV/IR" thrown around constantly. Here's the practical beginner version:
- Full spectrum is all you need. A quality quantum board LED that produces a broad white spectrum covers every stage of cannabis growth — seedling, veg, and flower. You do not need separate veg and bloom lights.
- 3000K–3500K (warm white) is slightly better for flowering — it has more red wavelengths that support bud development. Good for growers who veg shorter and flower longer.
- 4000K–5000K (cool white) has more blue wavelengths, better for vegetative growth and maintaining compact internodal spacing.
- Mixed spectrum boards (combining 3000K and 5000K chips) are ideal — they cover all bases in one fixture without any switching needed.
- UV and IR diodes are marketing extras at the beginner level. They can marginally improve trichome production in the right conditions, but the difference is minor compared to simply having enough intensity.
Don't overthink spectrum. A quality full-spectrum quantum board LED in the 3000K–4000K range covers everything you need for your first 3–5 grows. Focus on getting the right wattage for your tent size first — spectrum optimization is an advanced consideration for later.
Top LED grow light picks for beginners — with Amazon links
These are the specific lights we recommend based on real performance, value, and beginner-friendliness. All include Amazon affiliate links.
🔗 Affiliate disclosure: Links below are Amazon affiliate links. Trap Van Gundy earns a small commission at no extra cost to you. These are genuine recommendations — not paid placements.
The VIVOSUN AeroLight Wing AW200SE is our top pick for beginners who want a complete, smart solution. What sets it apart from every other light in this guide is the integrated circulation fan built directly into the fixture — this provides constant gentle air movement across the canopy, which is critical for strong stems, even temperature distribution, and CO2 circulation. For a beginner trying to minimize equipment and complexity, this is a game-changer. Compatible with the VIVOSUN Growhub app for full smartphone control — dim it down for seedlings from your phone, ramp it up for flower without touching the tent. High-efficiency Samsung diodes in a full spectrum configuration cover everything from seedling to harvest.
- Built-in fan eliminates a separate purchase
- App-controlled dimming via Growhub
- High-efficiency Samsung diodes
- Full spectrum — works all growth stages
- Even canopy coverage for 2x4 footprint
- Compatible with smart grow controller
- Requires Growhub app for full features
- 200W — need 2 for a 4x4 tent
- Wing shape best for rectangular tents
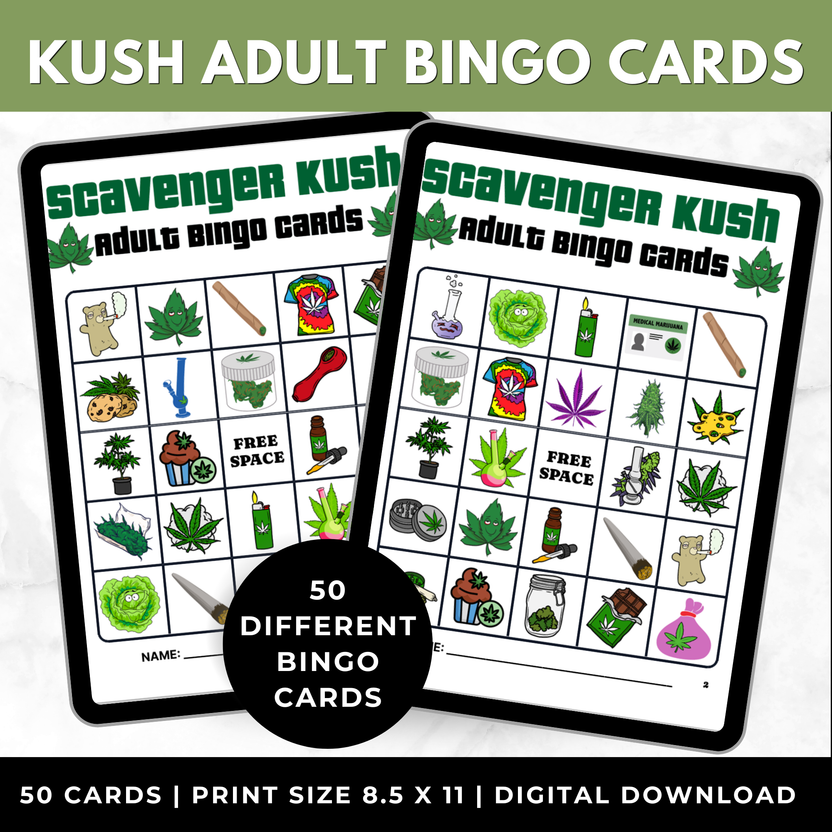
While your new light is in the mail, keep the smoke session legendary. 50 unique printable weed bingo cards — the stoner party game that's always ready to go.
- 50 unique bingo cards — no two alike
- Pull cards included — play immediately
- Perfect for game nights and smoke sessions
- Instant digital download — print at home
If you're not using the AW200SE with its integrated fan, you absolutely need a quality clip fan setup inside your tent. Good airflow does three critical things: it prevents the hot spots that form directly under any LED fixture, it keeps CO2 exchanging through your canopy (CO2 is your plant's food), and it builds strong stems by providing a gentle resistance that triggers the plant to strengthen its structure. The AeroWave A6 clips directly onto grow tent poles with a secure non-slip clamp — no DIY mounting required. Auto-oscillating means the airflow sweeps across your whole canopy rather than blasting one spot.
- Designed specifically for tent pole mounting
- Auto-oscillating — covers whole canopy
- Strong airflow for tent size
- 2-pack covers front and back of canopy
- Low noise for bedroom or office setups
- Not needed if using AW200SE (has built-in fan)
- Angle away from seedlings to avoid wind burn
Your grow light is only as effective as the environment around it. A quality tent with high-reflective mylar interior bounces all unused light back toward your canopy — dramatically improving the efficiency of whatever light you're running. The VIVOSUN S425 2x4 is the most popular beginner tent size for a reason: it's big enough for 2–4 plants, fits comfortably in a spare room or closet, and the 60" height gives you room to train plants and hang lights at the correct distance. The observation window means you can check your plants without opening the tent and disrupting your photoperiod dark period.
- High-reflective mylar maximizes light efficiency
- Observation window — check plants without opening
- 60" height accommodates trained plants
- Lightproof seams — critical for photoperiod grows
- Multiple duct ports for flexible ventilation
- 2x4 is narrow — works best with rectangular lights
- Check all zipper seams for light leaks on arrival
Fabric pots transform your root zone — and healthy roots directly feed the canopy your light is trying to illuminate. Air-pruning fabric construction prevents root circling, encourages dense fibrous root networks, and dries out significantly faster than plastic pots. That faster dry time is critical for preventing overwatering — the #1 seedling and vegetative stage killer. 7 gallon is ideal for photoperiod plants with a full veg cycle; for autoflowers, 3–5 gallon is often preferred.
- Air-prunes roots — denser, healthier root zone
- Dries faster — prevents overwatering
- Reinforced handles for easy repositioning
- 5-pack covers a full 2x4 setup
- Significantly outperforms plastic pots
- 7 gal may be oversized for autoflowers (use 3–5 gal for autos)
- Pair with elevated saucers — runoff needs to drain freely
A high-powered light without the right nutrition to support it is like a sports car with no fuel. Advanced Nutrients' pH Perfect formula automatically adjusts nutrient solution pH into the optimal range — removing one of the most common beginner errors. The bundled Sensi Cal Mag supplement prevents the calcium and magnesium deficiencies that commonly appear under intense LED lighting, especially in coco coir or RO water setups. Start at 25% of recommended dose and build up slowly.
- pH Perfect auto-buffering reduces pH problems
- Complete 3-part system covers all stages
- Cal Mag essential for LED grows
- TruShot measuring glass included
- One of the most trusted nutrient lines
- Don't start feeding until week 3–4 in pre-amended soil
- Start at 25% dose — increase slowly while watching plant
How high to hang your LED at each growth stage
Hanging your light at the correct height and intensity is as important as choosing the right light. Too close and you burn your canopy. Too far and your plants stretch and yield less. Here's the guide for the VIVOSUN AW200SE and most quality quantum board LEDs:
| Growth Stage | Height Above Canopy | Intensity Setting | Signs of Problem |
|---|---|---|---|
| Germination / Seedling | 30–36 inches | 25–40% | Bleached tips = too close/bright |
| Early Veg (wks 2–4) | 22–28 inches | 50–60% | Stretching = too far/dim |
| Late Veg (wks 4–8) | 18–24 inches | 70–80% | Dark green, compact nodes = good |
| Early Flower (wks 1–3) | 16–22 inches | 80–90% | White pistils forming everywhere = good |
| Peak Flower (wks 4–8) | 14–18 inches | 90–100% | Foxtailing = light too intense too close |
| Late Flower / Flush | 16–20 inches | 80–90% | Trichomes amber = harvest approaching |
Hold the back of your hand at canopy level under the light. If it feels warm but comfortable after 30 seconds, the intensity is about right. If it feels hot quickly, raise the light. This simple test works at any growth stage as a quick gut-check alongside your distance measurements.
LED mistakes that cost beginners their yield
- Running full intensity from seed to harvest. Seedlings burn under full-power LEDs. Always dim your light for the first 2–3 weeks or raise it significantly. A dimmable light (like the AW200SE) makes this trivial — dial it down from your phone.
- Buying a light based on tent size alone without checking quality. A cheap 300W blurple LED for a 3x3 tent is far worse than a quality 200W quantum board. Efficiency and spectrum quality matter more than raw claimed wattage.
- Hanging the light at one height the entire grow. Lower the light progressively as the plant grows taller and moves into flowering. Many beginner setups are set and forgotten — resulting in suboptimal intensity throughout the cycle.
- Not providing airflow to complement the light. Heat from any LED — even efficient ones — creates a hot spot directly below the fixture. Without a fan moving that air, you get temperature stratification that stresses the top of your canopy while the lower canopy stays cold.
- Thinking a $40 Amazon LED is comparable to a $200 one. It isn't. The diode quality, driver quality, heat dissipation, and actual light output are fundamentally different. In cannabis growing, you get what you pay for on lights more than any other piece of equipment.
See Real Grow Lights in Action
Grow room tours, lighting setups, and seed-to-harvest diaries on the Trap Van Gundy YouTube channel.
Subscribe — @trapvangundy@trapvangundy · Real grows, real results, no fluff
Plant-based. Prehistoric. No apologies. The Herbivore Smoking Dino tee is the official uniform for home growers who keep it green 24/7.
- Unisex sizing — fits everyone
- Smoking dinosaur graphic — iconic & funny
- Soft comfortable everyday tee
- Perfect gift for any grower or stoner
FAQ — LED grow lights for cannabis beginners
What LED wattage do I need to grow cannabis?
For a 2x2 tent you need 100–150W of quality LED. For a 2x4 tent, 200–300W. For a 3x3, 250–350W. For a 4x4, 400–600W. These are true wall-draw wattage figures — ignore inflated "equivalent" wattage numbers in product listings. Always check the actual power consumption spec. Quality matters more than wattage: a 200W quantum board outperforms a 400W blurple every time.
What is a quantum board LED and why does it matter?
A quantum board LED uses many small, high-efficiency chips spread across a large flat board, producing even light distribution, low heat per watt, and a full spectrum that supports all growth stages. It's the current gold standard for home cannabis cultivation. The alternative — cheap blurple LEDs with a few powerful chips — produces uneven, lower-quality light that results in noticeably worse yields. Always buy quantum board for cannabis growing.
How far should my LED grow light be from cannabis plants?
During seedling stage, keep LED grow lights 30–36 inches above the canopy at 25–40% intensity. During veg, lower to 18–24 inches at 70–80%. During peak flower, 14–18 inches at 90–100%. Always watch for signs of light burn (bleached or crispy tips, upward leaf curl) which indicate the light is too close or too intense, and raise accordingly.
Do I need a different grow light for veg and flower?
No — a quality full-spectrum quantum board LED covers both vegetative and flowering stages. You don't need separate veg and bloom lights. What you do need is a dimmable light so you can reduce intensity for seedlings and ramp up for flowering. The VIVOSUN AW200SE handles this via the Growhub app, letting you dial intensity from your phone without touching the tent.
Are cheap Amazon LED grow lights worth buying?
No — not for cannabis. The diode quality, driver efficiency, heat dissipation, and actual light output of cheap budget LEDs are fundamentally different from quality quantum boards. A $40 LED claiming 2000W equivalent draws about 100–150W from the wall and produces lower-quality light. Spend at least $150–200 on your grow light and buy a reputable brand. Your light is the one place not to cut corners in a cannabis setup.
Ready to Light Up Your First Grow?
Grab the VIVOSUN AW200SE, pair it with the 2x4 tent, and follow the Trap Van Gundy guides step by step. Subscribe on YouTube for real grow content and check the shop while you wait for delivery.
Subscribe on YouTube — @trapvangundyShop Trap Van Gundy →